top of page
I built a mini-harmonium for my musical instrument design class. The purpose of this class was to build and use a LabVIEW Sound Analyzer on an instrument that we hand-made, then compose and play a piece for the class!
HARMONIUM
STEP 1: DESIGN
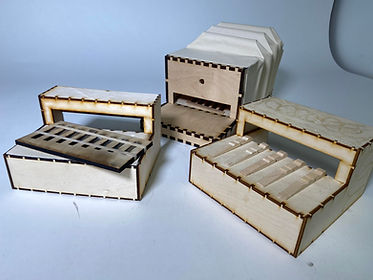
I parameterized the design in Onshape to make iteration quick. Some earlier iterations and the final harmonium are shown on the right.

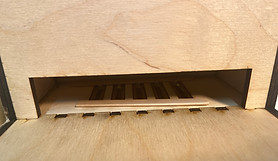
STEP 2: REEDS
The crucial sound-making component and biggest assumption to be tested was whether I could make and tune my own reeds. I designed and waterjet several attempts and sanded and bent the components to tune them. Ultimately, I was not able to tune them to satisfaction, so I purchased tuned reeds.


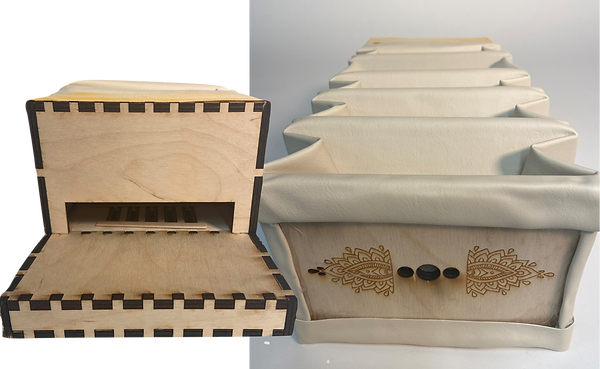
STEP 3: ACCORDION
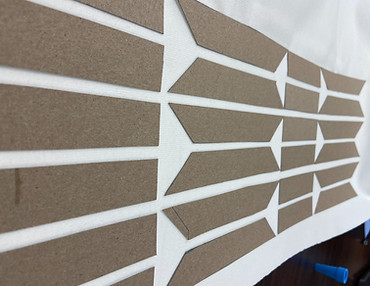
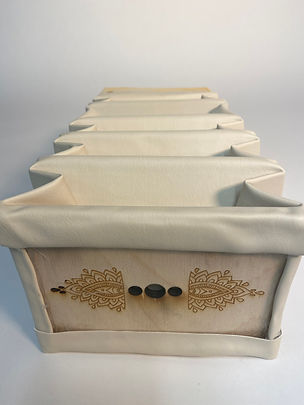
The next assumption to test was whether I could generate enough wind and pressure to play the instrument. I made an origami accordion, unfolded it, and created the shapes in Onshape. I lasercut the shapes out of cardboard and glued them to faux leather to create the shapes. Below you can see the design, the lasercut cardboard pieces, and a fun stop-motion!


STEP 4: ASSEMBLY & FINAL TOUCHES
After attaching the accordion, I tested the harmonium... it made a lovely sound! I finished several iterations of it, added embellishments, and composed a little piece. The final harmonium is played by placing fingers directly on the reeds to modulate the sounds.


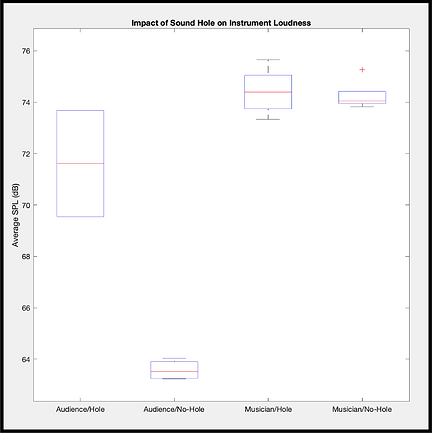
STEP 5: ANALYSIS
Throughout the building process, I was working on building a sound analyzer in LabVIEW. I used this to help me determine whether or not a certain-sized sound-hole in the front of the harmonium improved the sound. The analysis showed me that the sound-hole made a statistically significant impact on audience loudness!

bottom of page